
Celestial Jelly Nails: How to Recreate the 3D Moon & Star Manicure Everyone’s Pinning
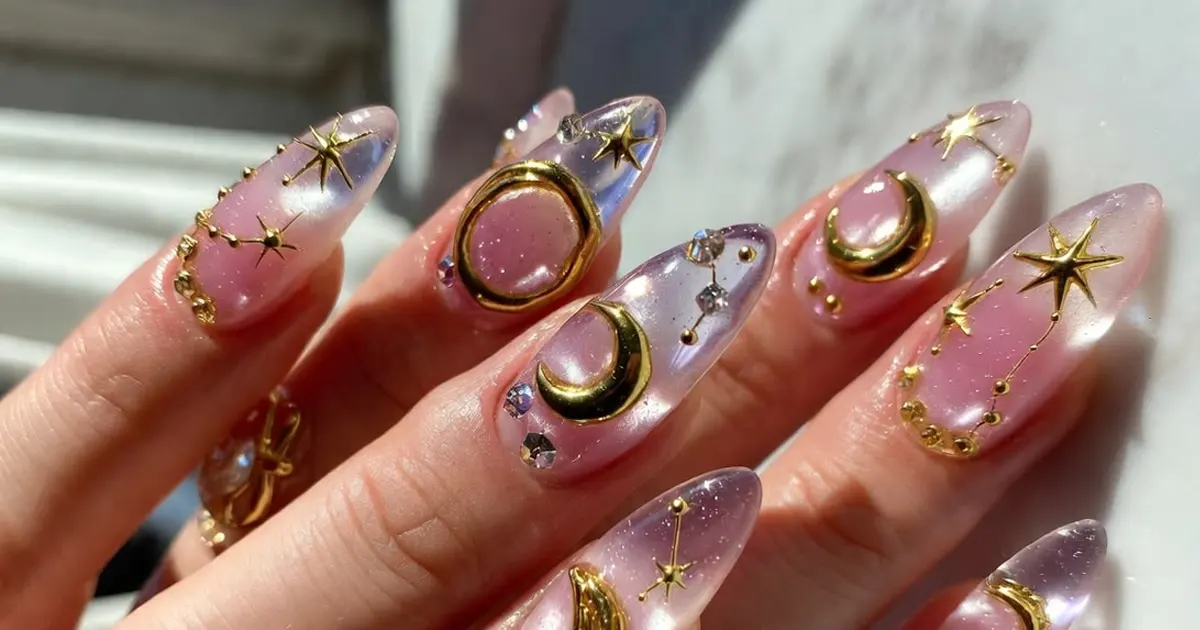
If you’ve been scrolling nail inspo lately, you’ve probably seen it: translucent jelly pink nails with tiny gold moons, stars, and crystal constellations that look like they’re floating inside the nail. It’s dreamy, it’s a little bit witchy, and it’s one of the most-saved nail looks on Pinterest right now called Celestial Jelly Nails
The good news? You don’t need a $90 salon appointment to get this look. With the right base, the right stickers, and about 30 minutes, you can build this almost entirely at home. Here’s exactly what you need and how to layer it.
What Makes “Celestial Jelly Nails” Different
The magic of this look comes down to three layers working together:
- A translucent jelly base — sheer pink or clear polish that lets light pass through, giving that “wearing the night sky” glow
- 3D embossed decals — moons and stars with actual raised texture, not flat stickers, so they catch the light like tiny charms
- A long almond shape — the elongated canvas that gives the constellations room to “float” down the nail
Get any one of these wrong and the look falls flat. So let’s go through the products that actually pull it off.
The Base: Almond Gel Nail Tips
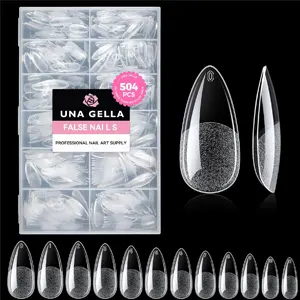
Everything starts with the shape. Short or square nails will crowd the design and make it look busy instead of ethereal — you need that long, tapered almond canvas for the moons and stars to feel scattered and intentional rather than crammed.
For an at-home setup, the UNA GELLA Almond Gel Nail Tips are a solid pick. They come pre-etched, so you skip the buffing step before applying gel, and the pack includes 12 sizes so you’re not stuck trying to force one shape onto every finger. Because they’re a soft gel formula rather than hard acrylic, they also flex slightly with your natural nail, which helps the tips last longer without lifting at the edges.
Application tip: size each nail individually before you start — almond tips run narrower at the tip than square or coffin shapes, so don’t assume your usual size will fit the same way.
The Glow: Sheer Jelly Polish or Gel
This is the layer that does the heavy lifting for the “night sky” effect. You want something translucent — sheer pink, sheer lilac, or clear — applied in 2 thin coats over your tips. Because it’s not fully opaque, light passes through and bounces off whatever’s underneath, which is exactly why the celestial decals look like they’re suspended inside the nail instead of sitting on top of it.
If you don’t already have a jelly-finish gel polish in your kit, look for one labeled “jelly,” “sheer,” or “milky” — full-coverage/opaque polishes won’t give you the same translucency no matter how thin you apply them.
The Constellations: 3D Embossed Moon & Star Decals
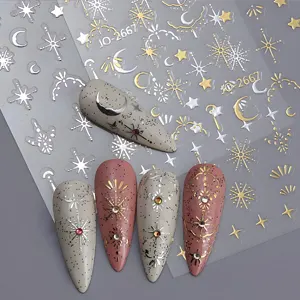 This is where the design actually happens, and it’s also where most DIY attempts go wrong — flat stickers just don’t read as “3D.” You want decals with actual embossed texture.
A few options depending on the exact finish you’re after:
- Moon Star Nail Art Stickers, 5D Embossed with Elegant Foil Accents, Dreamy Celestial Galaxy design — this one leans into a soft purple-and-gold celestial palette, which pairs beautifully with a sheer pink or lilac jelly base for that “galaxy” undertone.
- Star Moon Stickers, 5D Embossed Silver Metal Texture, with Love Curve Arc/Necklace design — a more minimalist, silver-toned option if you want a cooler, moonlit look rather than gold and warm tones.
- 12 Sheets Silver Gold Moon Star Stickers, 3D Self-Adhesive Decals — the best value if you want variety to experiment with, since you get multiple sheets and can mix silver and gold placements across different manicures.
How to apply them: work on one nail at a time so the decal doesn’t dry out. Peel each star or moon off the backing sheet with tweezers (your fingers will crease the ultra-thin film), place it while your jelly polish is still slightly tacky if you’re doing polish, or press it onto cured gel and seal with a no-wipe top coat. Don’t overcrowd — 3 to 5 decals scattered asymmetrically down the nail reads as “constellation.” Ten decals reads as “cluttered.”
Putting It All Together: Step-by-Step
- Prep and size your almond gel tips, apply, and shape/file as needed
- Apply a thin base coat and cure
- Apply 2 thin coats of sheer jelly polish or gel for the translucent base
- While the final coat is tacky (or cured, if using gel decals), place your 3D moon and star decals with tweezers — cluster them toward the tip or scatter them down the length of the nail
- Seal everything with a glossy top coat to lock the decals in place and protect the embossed texture from lifting
- Cure under a UV/LED lamp if you’re working with gel products
Done right, this holds up for 2–3 weeks without the stars lifting or the jelly base yellowing.
A Few Things That Make or Break This Look
- Don’t skip the tacky-layer timing. Decals applied to fully dry polish are far more likely to lift within a few days.
- Less is more with placement. Real constellations aren’t symmetrical — stagger your decals rather than mirroring them nail to nail.
- Match your metal tones. Pick either the gold-and-purple decals or the silver set for a full set rather than mixing both in the same manicure — it keeps the look cohesive instead of busy.
Save This Look
If you want the exact visual reference while you’re shopping or applying, save the original pin here: Celestial Jelly Nails on Pinterest
This post contains affiliate links. If you purchase through them, I may earn a small commission at no extra cost to you.